AdSense

Wednesday, April 23, 2014

Tips for Framing Doors and Windows in the Craftsman Style

What started as a small project turned into a major undertaking! I decided to frame this lonely window at the bottom of my stairs...


and it looked so good it made the door frame next to it look shabby,


which made me realize the door needed some fresh coats of paint, which made me believe that all the windows and doors needed to be framed and painted (yikes!)

Here are some tips I came up with after framing several different windows and doors in my house in the Craftsman style.

Materials - I used MDF mostly because it doesn't expand and contract with change in temperature the way wood does, but it's also smooth and primed when you buy it. That being said, I live in the desert, so I don't have a lot of trouble with moisture build up in my windows (MDF doesn't do well with prolonged water exposure).

As a standard, I used 2.5" wide pieces of MDF for the side pieces for doors and windows and also for the apron (piece underneath the window).


However, I soon realized that each window is very different and not all would allow space for the extending top piece with crown. So I played around with how wide my side pieces would be in different spaces. For my kitchen windows, I had to rip the side pieces down to 1" for the top pieces to fit.

I used the same crown and trim for the door frames, but instead of putting a 5.5" piece of MDF on top, I used a 7.25" piece.


Removing frames - If you're removing a frame, I learned it's best to put a piece of scrap wood behind whatever you're using to rip it out to save your dry wall.


Caulking -I wound up saving myself a ton of time and frustration by taping BEFORE caulking and leaving a small gap where I wanted to caulking to go. You have to hurry and remove the tape after you smooth it down, which means you have to retape after it hardens before you prime and paint, but you'd have to tape the frame to touch up wall paint if you didn't tape before caulking anyway.

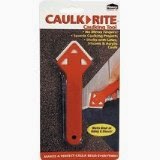
I know a lot of people like to use their fingers to smooth out the caulk, but I like to use a caulking tool first and then use my finger for touch ups if necessary.

http://www.amazon.com/Homax-5850-10-06-Perfect-Caulk-Finisher/dp/B001HHEBI2/ref=sr_1_1?ie=UTF8&qid=1398221746&sr=8-1&keywords=caulking+tool

Attaching molding - I found that nailing the crown and decorative molding to the topper piece before attaching it to the wall works a million times easier. It's great to match up the side corners this way. Then you can attach the whole thing as one piece to the wall.


I love how it makes my ceilings seem taller!


Now for painting all those interior doors...

Thursday, April 17, 2014

DIY Decorative Air Intake Grate


The air intakes in my house are getting old and bent up, so I decided to make some more decorative ones.
Before:

After:


Materials Needed:
1x2 pieces of wood
Decorative Metal Sheet (I got mine at Hobby Lobby)
Saw
Tin snips
Wood glue
Hot glue gun
White paint
Optional: black paint (to paint the inside of the wall behind the grate)

I started by measuring the grate to decide how tall and wide I should make it. I only wanted to buy one sheet of metal, so I kept that in account.


The metal sheet would not be long enough to cover the whole opening, so I cut the sheet in half lengthwise and then cut one of those pieces in half to add to the side.


In order to hide the add on piece, I used 1x2s to divide it into 3rds. I glued all the pieces together with wood glue and then hot glued the sheet metal to the back.


 Here you can see the piece added on.


Then I flipped it over and spray painted it white.


Since you can see through the grate more than a typical wall grate, I painted the inside of the wall black to make it less visible.

Friday, April 4, 2014

DIY Pottery Barn Mia Faceted-Crystal Flushmount/ Refab a Boob Light


We all have those blasted boob lights. I have 4 that I wanted to replace, but with my low ceilings, I needed something close to the ceiling. As I was shopping the Pottery Barn website, I came across the Mia Faceted-Crystal Flushmount Light. It was lovely, but for $129 a piece, I'd be shelling out way more than I could stomach for 4 of them, even if I waited for a sale.

As I was admiring it, I noticed it was constructed very similarly to the boob lights I already had. I had a long string of acrylic crystals left over from redoing my dining room light, so I decided to DIY!!

Materials used:
Boob light
Can of oil rubbed bronze spray paint
Nail and Hammer or Dremmel tool with metal drill bit
String of acrylic crystals (affiliate link)
Measuring tape
Optional: yarn or string to help measure circumference
Optional: Sharpie


There's a small piece that screws on the bottom and holds up a metal circle that the dome rests on. Once I removed the glass dome (setting aside for a bird bath), I was able to remove the light from the ceiling and start putting holes in the outer edge to hold the end of each crystal strand.

First I removed he reflective foil.
One of my lights had some glue that needed to be goo goned. Then I taped the inside of the light socket so I could spray paint the bolt and socket oil rubbed bronze to match the rest of the fixture.
Looks good, but I should have waited to paint it after I drilled the holes. I wound up getting metal dust stuck in the freshly dried area and had to repaint to cover some scratches made.
I wanted to make 2 rows of 24 holes. (The holes would be across from each other to loop the wire strands through. I used a piece of string to measure the circumference and divided it by 24. I decided to round up and space the holes 1.25" apart, which made only 20 holes, but I figured it would be sufficient.
I made a piece of yarn 1.25" and used a Sharpie to mark where my outer holes would be.
I used a Dremel tool to make most of the holes, but near the end of the project, my bit was getting really dull and I ended up using a nail and hammer.
It worked a little easier and the holes were less messy.
For my second light I used solely a nail to make all the holes and it went super fast.


Next I needed to put holes in the metal circle.

I traced it on some paper to help figure out spacing and then imitated it with a Sharpie on the metal. I started with evenly putting dots for a pentagon (black dots). Then put a dot in the middle of each of those sections (red dots). And then put another dot in the middle of those sections (blue dots).


I separated my crystal strand into strings with 6 crystals. 


I attached all the crystals to the small circle first.


Then I slipped it on the metal rod and started attaching around the outside.


When I was done, I screwed on the end piece, flipped it over and had a pretty looking light!

This one has crystals all the same size


This one has crystals of varying size


I love the way the light reflects the crystals.


Linking up to:

http://www.remodelaholic.com/2015/02/white-painted-projects/
http://www.myrepurposedlife.com/2014/05/catch-as-catch-can-165.html

Repurpose an Old Entertainment Center into a Custom Hutch and Trash/Recycle Center


My kitchen is in need of two things: more upper cabinets and a place to hide our trash and recycling cans. This space is the only place are I have to put more storage.

I started designing plans for an L shaped hutch. I was going to build it from scratch until...
I found this beast at DI. I thought maybe I could cut and sand and repurpose it into something to fit my space. It was laminate (which I normally avoid for refurbishing projects), but the finish was so thick I knew I could sand it down enough to get a decent paint job.

I started by taking apart the entire thing removing cam locks and dowels and labeling every part with masking tape.

All taken apart

I wanted to have two separate pieces - a tilt out trash can/recycling cabinet and a hutch with cupboard doors. The two long side pieces would need to be cut, so the top hutch would be separate.

Measuring my trash cans, I knew I'd need to build cabinet doors for the tilt out portion.
I placed the doors on the bottom piece so I could figure out where to cut the board and find out how wide and deep I'd need the trash/recycle portion to be.


Once I cut it down, I added the front and back pieces to make the bottom platform. I drilled all the pocket holes with my Kreg Jig since I wanted to paint before ultimately putting it together.


Since laminate doesn't always wind up with a smooth edge when it's cut, I wrapped masking tape around where I needed to cut and then drew on the tape my cut line.

The parts that I knew would be inside and hidden I didn't spend as long sanding.


I filled some of the holes with DAP Plastic Wood Filler. I needed something that would harden and be sandable and it worked great.


Once I wiped down everything down, I used 2 coats of primer and two coats of semi-gloss paint, sanding in between each layer.
We've been using this bottom part while I got the hutch portion completed. I've been searching everywhere to find hinges that were long enough to take the trash cans out without having  the tilt out doors falling to the floor whenever they were opened. My husband suggested just putting a piece of wood on each side at the bottom as a stopper, so the doors physically wouldn't open further than I wanted.


Works perfectly!

Now onto the hutch. I started sanding two of the doors and the two outside pieces. I decided to make this the same depth as the cabinet it would be sitting next to.

I placed the doors and outside cabinets together to figure out how wide to make the top and bottom pieces. I drilled pocket holes and then sanded, primed, and painted.
 I decided to add a shelf in the middle and had a finished shelf from the "as is" section of IKEA. I just cut it down to size and added pocket holes.
I had some left over bead board from my Entertainment Center project that I wanted to add to the back. They weren't long enough to cover the entire back, but I was able to cover the bottom to the shelf, which should work fine and allows me to mount the top to the wall more easily anyway.

I put together the bead board tongue and groove pieces and painted them on my table.

Then I was able to just nail them in place.

 
I added a 1x2 to the bottom of the hutch and a scrap board across the back of the top to give it more stability.


The hutch is attached to the trash/recycle piece using pocket holes and it's also attached to the wall.
About halfway through this project I wish I would have just built it from scratch, but I wanted to see it through. At least I saved something from going to the dump.

Update 12/27/14: I added crown molding to the top. It really gives it a finished look and matches the rest of my cabinets.

Linking up to Catch as Catch Can 195:  
http://www.myrepurposedlife.com/2015/01/catch-as-catch-can-195.html?utm_source=feedburner&utm_medium=feed&utm_campaign=Feed%3A+blogspot%2FPgMj+%28My+Repurposed+Life%29

and Remodelaholic January Link Party